


Keeping your lawn green and healthy can be hard, especially when it’s hot and dry. A lawn sprinkler system can help by watering your grass evenly and automatically. Let’s walk through how to set up a lawn sprinkler system in 13 easy steps!
Why You Need a Lawn Sprinkler System
A lawn sprinkler system is a great way to water your lawn for several reasons:
- Saves Time: You don’t have to water your lawn by hand.
- Even Watering: Sprinklers cover your lawn evenly.
- Conserves Water: They help save water by directing it where it’s needed.
- Makes Your Yard Beautiful: A green lawn makes your home look nicer!
Step 1: Plan Your Lawn Sprinkler System
First, think about where you want the sprinklers to go:
- Look at Your Lawn: Walk around and see where your grass needs water.
- Draw a Map: Make a simple drawing of your yard.
- Create Zones: Different areas may need different amounts of water.
Step 2: Check Local Rules
Before starting, make sure you know the rules about lawn sprinkler systems in your area:
- Permits: Some places need permission to install a sprinkler system.
- Watering Rules: Check if there are any rules about when you can water your lawn.
Step 3: Choose Your Sprinkler Type
There are different kinds of lawn sprinkler systems:
- In-Ground Systems: These are permanent and work well for big lawns.
- Above-Ground Systems: These can be moved around easily.
- Drip Irrigation: This is best for gardens, as it waters plants directly.
Step 4: Pick Your Pipes
You’ll need pipes for your lawn sprinkler system. Here are some options:
- PVC Pipes: Strong and long-lasting, good for underground use.
- Polyethylene Pipes: Flexible and good for areas with cold weather.
- Copper Pipes: Very durable but more expensive.
Step 5: Get Your Tools and Materials
Make sure you have everything you need before starting:
- Tools:
- Shovel
- Pipe Cutter
- Wrench
- Screwdriver
- Materials:
- Pipes
- Sprinkler Heads
- Connectors
- Timer
Step 6: Mark Where the Sprinkler Heads Go
Use flags or spray paint to show where each sprinkler head will be. Remember:
- Different Sprinklers: They spray water differently, so plan for that.
- No Obstacles: Make sure nothing blocks the sprinklers.
Step 7: Dig Trenches
You need to dig trenches for the pipes of your lawn sprinkler system:
- Depth: Dig about 6-12 inches deep, depending on your area.
- Width: Make sure the trench is wide enough for the pipes.
- Flat Bottom: Keep the bottom flat for the pipes to sit on.
Step 8: Lay Down the Pipes
Now, place the pipes in the trenches:
- Cut the Pipes: Measure and cut them to fit your plan.
- Connect Them: Use glue for PVC pipes or clamps for others.
- Test Them: Run water through to check for leaks before burying.
Step 9: Connect to Water Supply
Next, connect your lawn sprinkler system to your home’s water supply:
- Turn Off Water: Shut off your main water supply.
- Cut the Line: Carefully cut a small opening in the main line.
- Add a Tee Fitting: This will connect your sprinkler system.
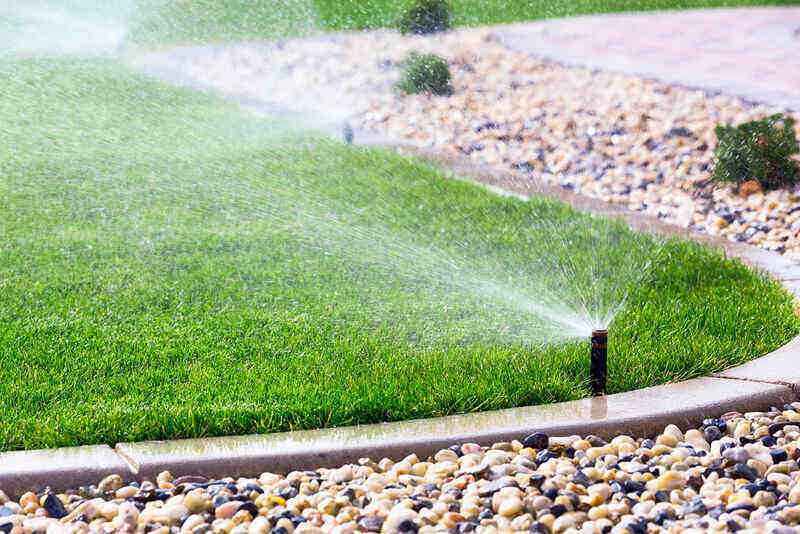
Step 10: Install the Sprinkler Heads
Now, attach the sprinkler heads to the pipes:
- Screw on the Heads: Attach them securely.
- Flush the System: Turn on the water briefly to clear out debris.
- Adjust Heads: Make sure they’re pointing in the right direction.
Step 11: Set Up the Timer
A timer helps your lawn sprinkler system water automatically:
- Choose a Spot: Place the timer where it’s easy to reach.
- Connect Wires: Follow the instructions to attach it to the valves.
- Set a Schedule: Program when you want the sprinklers to run.
Step 12: Add Backflow Prevention
Backflow preventers keep your drinking water safe:
- Get a Device: Choose one that fits local rules.
- Install It: Follow the instructions for proper setup.
Step 13: Test Your Lawn Sprinkler System
Finally, test everything to make sure it works:
- Turn on the Water: Slowly turn on the main water supply.
- Check Each Sprinkler: Make sure all heads are working.
- Make Adjustments: Change any heads or settings if needed.
Taking Care of Your Lawn Sprinkler System
After your lawn sprinkler system is installed, you need to keep it in good shape. Here are some tips:
- Watch Water Pressure: Make sure it’s not too low or too high.
- Fix Clogs: Clean any clogged heads to keep water flowing.
- Adjust Heads: Change their positions if they’re watering too much or too little.
- Look for Leaks: Check pipes regularly for leaks.
- Replace Broken Parts: Fix or replace any damaged sprinkler heads.
- Prepare for Winter: If you live in a cold area, drain your system before winter.
FAQs
How Much Does It Cost to Install a Lawn Sprinkler System?
The cost can vary. DIY setups might cost between $500 and $2,500, while hiring someone can range from $2,000 to $5,000.
Can I Install It Myself?
Yes! Many people can install their own lawn sprinkler systems, but ask for help if you’re unsure.
How Long Will It Take?
It depends on your lawn size. A small one might take a day; a bigger one could take longer.
How Often Should I Water My Lawn?
Most lawns need about 1 inch of water each week, depending on the grass and weather.
What Is Backflow Prevention?
It’s a device that stops dirty water from going back into your clean water. It’s important for health and often required by law.
Conclusion
Setting up a lawn sprinkler system can make your yard look amazing. By following these 13 easy steps, you can keep your lawn healthy and green. Remember to check your system regularly to keep it working well. If you ever feel confused, don’t hesitate to ask a professional for help.
Save Water With A Sprinkler System With Guerrero Landscaping
Guerrero Landscaping provides satisfactory answers to all these questions. We provide customized designs that meet your lawn requirements. Read more on how our 4-step process makes the lawn sprinkler installation easy and hassle-free for you.
Call us at (469) 398- 9896 or get a free quote.